Recently I ran into problems when resizing motifs while creating a collection because I drew some motifs by hand, drew some in Procreate and some in Photoshop with a Wacom.
What I found to my dismay was that (on a 300DPI document) pixels are MUCH smaller in Photoshop than they are in Illustrator. I had to resize a log of the motifs I created in Photoshop and Procreate, which created a big mess with line thickness. I ended recreating the entire pattern once I figured out the problem. You can read the post I wrote about this here.
When lines or strokes are created as shapes, if you have to scale a motif up in illustrator, not only does the size of the motif get larger but the outlines get bigger / thicker as well. None of this will matter if you plan on using the Shape Builder tool to combine your lines and shapes to create a motif that doesn’t have outlines. But a pattern that uses only outlines, or has shapes AND outlines, you might run into consistency problems.
Sometimes the problem is so severe you have to start over and redraw everything. But sometimes you don’t have to start completely over if you just need to tweak the line widths / thicknesses a small amount so they all look uniform throughout all the motifs in the pattern.
Use the Offset Path tool if you have to resize motifs
Again, none of this matters if you don’t plan on keeping the outlines around the shapes. But if your motif uses online outlines or it uses shapes and outlines, when you resize it the outlines might get too big or fat. You can fix this problem using the Offset Path tool. Just don’t forget to expand it when you’ve achieved a result you like.
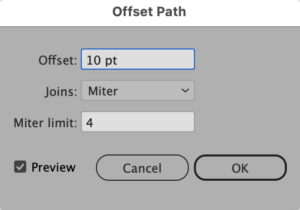
Select the motif or area within the motif and choose Effect > Path > Offset Path.

By default you’ll get a very thick line added to your motif but you can fix this.
If you’re enlarging a pattern you’ll probably want to REDUCE the thickness of the line, so do an offset path with negative (-) numbers.
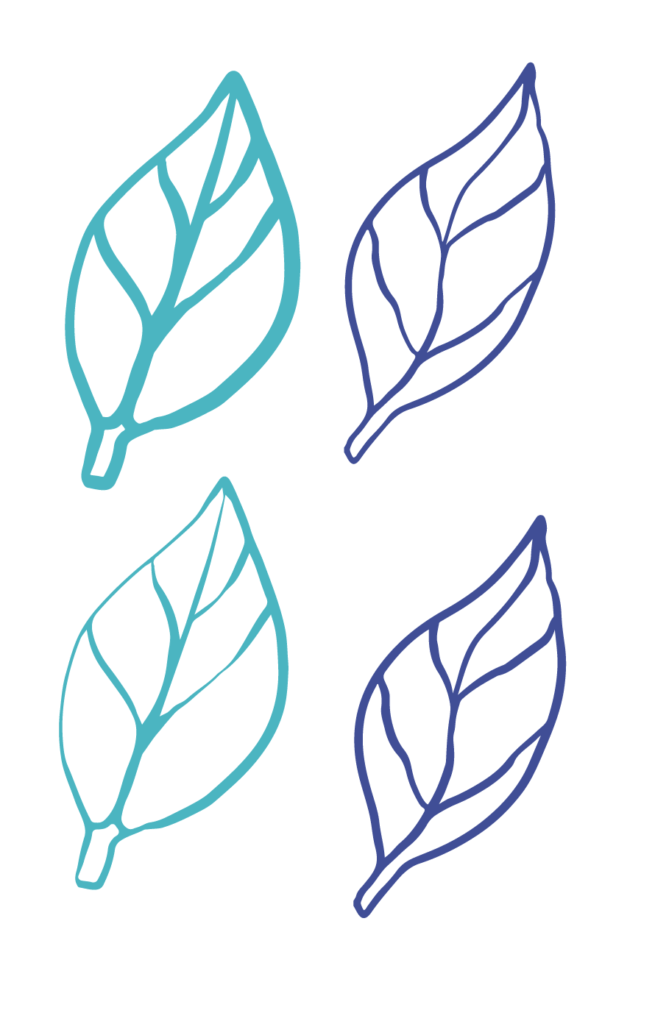
For example in the image below the light blue was decreased with -1.4 offset path and the dark blue leaf was increased with a .4 offset path.
You can also play around with the Joins: attribute. “Rounded” usually produces a rounded path.
When you get the result you like simply select the motif again and choose Object > Expand Appearance to set that offset you just created.


