I wanted to share something I discovered recently while playing around in Adobe illustrator. I’ve often struggled with the Blob Brush in Adobe Illustrator because I have difficulty creating anything other than a blobby line with them. So I went on a search and found something really interesting.
You can use Illustrator’s calligraphic brushes with the Blob Brush tool! 🤯
There are two sets built into Illustrator if you have a Wacom. Calligraphic brushes are found under Artistic Brushes, and the Wacom 6D Brushes. You cannot use the splatter brushes that come with the Wacom 6D brushes when using the Blob Brush; only the calligraphic brushes.
Design Your Own Calligraphic Brushes
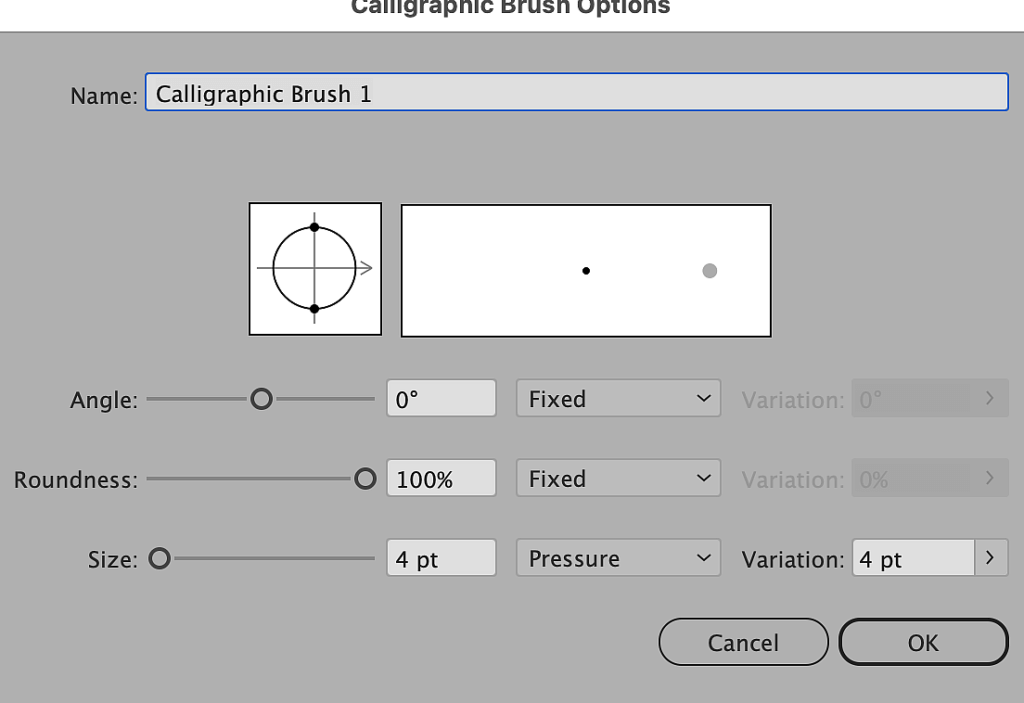
You can also create your own calligraphic brushes and use those with the Blob Brush. That way you can set the default size, angle and the variation you can get in your line. I tend to keep it simple and only effect the brush size using pressure with my Wacom pen. But of course you could change anything in that dialog box to create the brush you want.
To create a new calligraphic brush open the Brushes panel by going to Window > Brushes.
Once opened, go up to the hamburger menu in the upper right corner of your Brushes Panel and choose New Brush > Calligraphy Brush.
You can change the angle, roundness and size of your new brush. I tend to leave the angle and roundness at fixed and change the size of the brush with the amount of pressure from my pen.
Create a set of custom calligraphic brushes to use with Blob Brush tool
You can also create multiple brushes and save them as a user defined brush set. You can see some of the custom calligraphic brushes I’ve created below. To save a brush set, start by opening your brushes panel and clear out all the default brushes there. The quickest way to do that is to go to the panel menu and choose “Select All Unused” then click the trashcan to delete them from this set.
Then create your brushes using the instructions above. When you’re done go back to the menu and choose “Save Brush Library.” You can save it inside the Brushes Preset folder or anywhere on your computer.
The next time you create a new Illustrator document, open your new brush set by clicking the little library icon at the bottom-left corner of the brushes panel and choose “User Define…” Find your brush set to open.
The Blob Brush is still a bit quirky
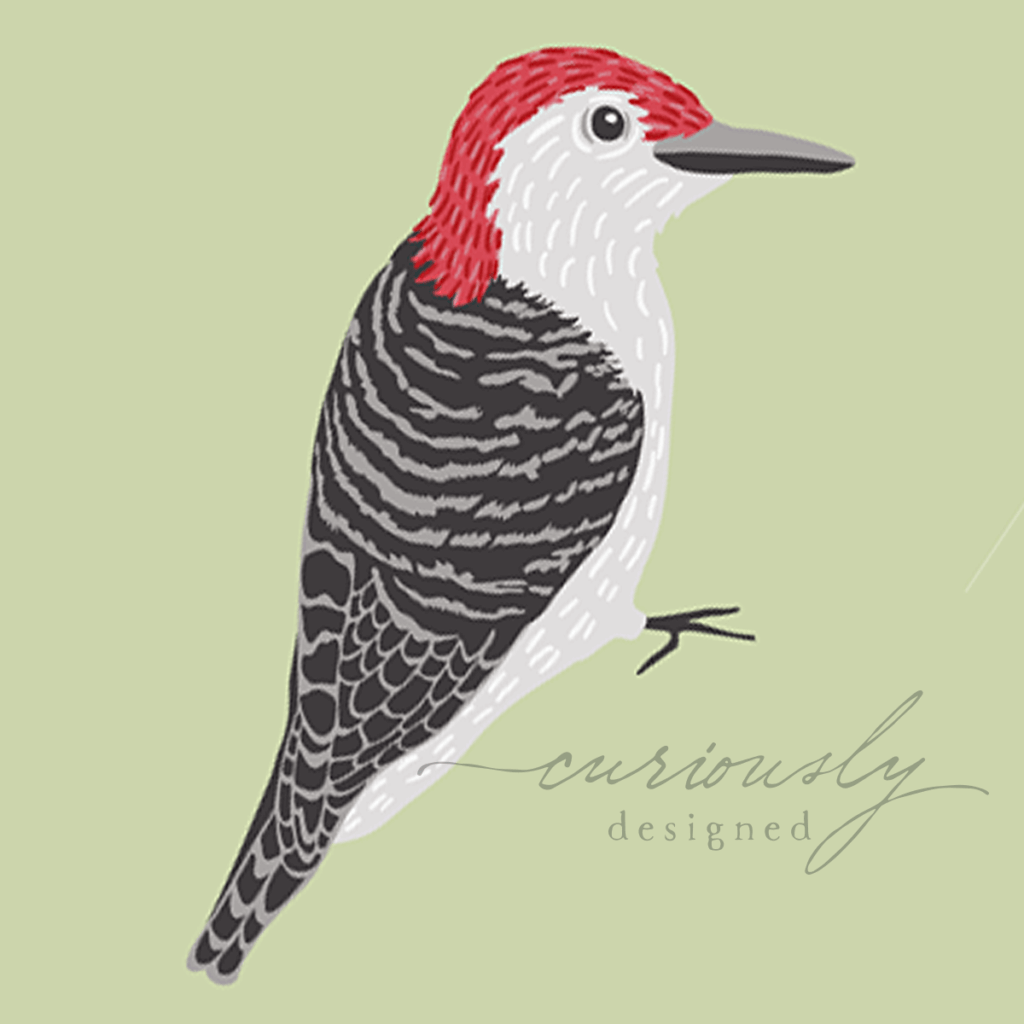
The Blob Brush used in this way can be a bit quirky in that you have to RE-select the brush you want to use if you click off the Blob Brush to use another tool. Going back to the Blob Brush it defaults back to it’s regular monoline blob. So I usually keep the brushes panel open and every time I choose the Blob brush I select a calligraphic brush to use. You can get some pretty interesting results with these custom brushes, If you look at the featured image of the post, the woodpecker’s texture and feathers were drawn with custom Blob Brushes.
You can still use the left and right bracket keys to change the size of a custom brush you created and I do this often. But like I said, if you use another tool and then go back to the Blob Brush, it doesn’t retain the memory of the last brush you used. You have to reselect the calligraphic brush you want to use and then use the [ ] keys to resize it. Consequently I made a bunch of brushes of the same shape & pressure, but different sizes. That way I only have to select a calligraphic brush when I choose the Blob Brush.
Adobe Fresco’s Blob Brush Tool
As a sidenote: You can use Adobe Fresco’s vector brushes (blob brush) and get MUCH better results and more easily. But unfortunately after about a week of trying Fresco I found it too buggy for me as it kept freezing in the middle of a design. I went online and found many people are having the same problems.
If you have Windows 10 you can pay a monthly subscription fee to use to the desktop version of Fresco but they don’t make it for the Mac desktop, only IOS.
I also tried the Blob Brush inside Illustrator for the iPad. And although they are easier and nicer to use than the desktop version of Illustrator, they don’t behave anywhere near as well as Fresco’s vector brush and I decided the hassle wasn’t really worth it. I found creating my own calligraphic brushes inside the desktop version of Illustrator worked almost as well as using the Blob Brush in Illustrator’s iPad version.
